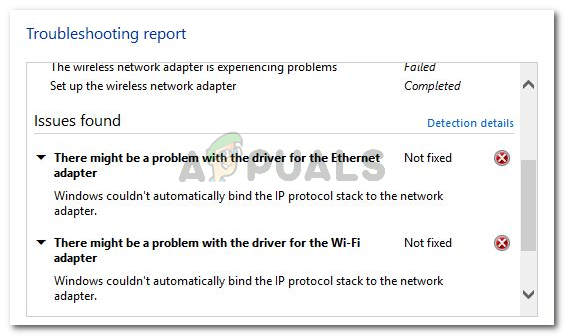
What is causing the Windows couldn’t automatically bind the IP protocol stack error
If you pay attention to the details, the error message is slightly pointing you to the source of the problem. We investigated this particular issue by looking at various user reports and the fixes that they used to resolve the problem. From what we gathered, there are several culprits that are often reported as being responsible for the apparition of this issue: If you’re struggling to resolve this particular issue, this article will help you to troubleshoot the issue. Below you have a collection of fixes that other users in a similar situation have used to get the issue resolved. For the best results, follow the methods below in the order that they are presented until you find a fix that is effective in resolving the issue in your particular scenario.
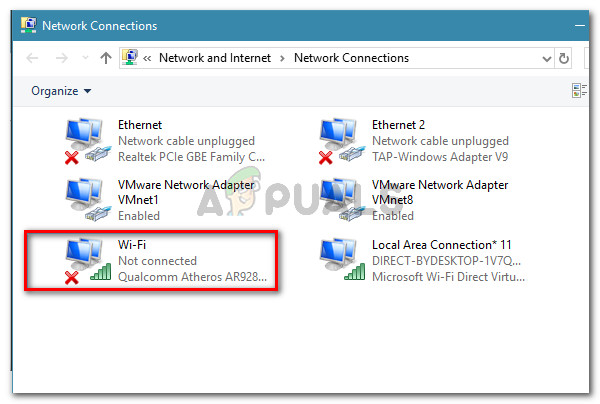
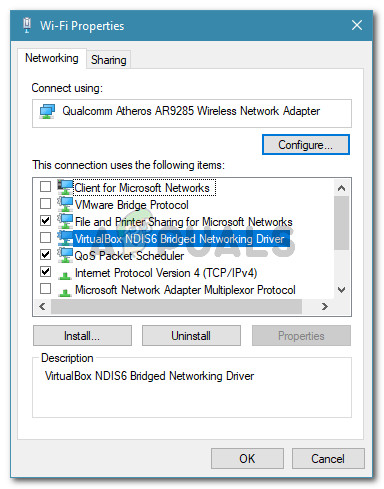
Method 1: Reverting to the default Network Adapter Properties settings
Let’s start simple – by making sure there aren’t any other network items that are interfering with the connection (other than the standard ones). It’s likely that you see this issue occurring because a 3rd party network client (VPN, Virtual Machine Networking driver, or something else) is causing your wireless connection to malfunction. You can typically resolve any type of interference of this kind by ensuring that the Wi-Fi connection is only using the required items that it needs. Here’s a quick guide on how to do so: If you’re still encountering the “Windows couldn’t automatically bind the IP protocol stack to the network adapter” error, move down to the next method below.
Method 2: Using Registry Editor to add a DhcpConnEnableBcastFlagToggle value
There’s another popular fix that seems to have helped a lot of users to resolve the “Windows couldn’t automatically bind the IP protocol stack to the network adapter” error. This method involves using Registry Editor to navigate to the NetworkCards key and fetching the value data of the adapter that is displaying the error. We’ll then use that adapter value data to navigate to its ServiceName string and create a new DWORD named DhcpConnEnableBcastFlagToggle. This might seem like a hard method to replicate since it’s all done inside the Registry Editor, but it’s actually pretty easy to do. This procedure will not delete anything from your Registry, so you run no risk of damaging any other component if you follow the instructions below to the letter. Here’s what you need to do: If you’re still encountering the “Windows couldn’t automatically bind the IP protocol stack to the network adapter” error, move down to the next method below.
Method 3: Removing interfering CISCO VPN registry keys
As per various user reports, it seems like older versions of the Cisco VPN are often responsible for causing this particular error. There’s a lot of user speculation that this happens because older Cisco VPN builds are not designed to run play nice with the latest Windows 10 updates (Anniversary update and the Creators Update). Apparently, the Cisco VPN app can leave behind some registry key (this one is causing the error) even if the program is uninstalled. Luckily, you can resolve this quite easily by running an administrative CMD command. Here’s a quick guide on how to do this: If you’re still seeing the “Windows couldn’t automatically bind the IP protocol stack to the network adapter” error, move down to the next method below.
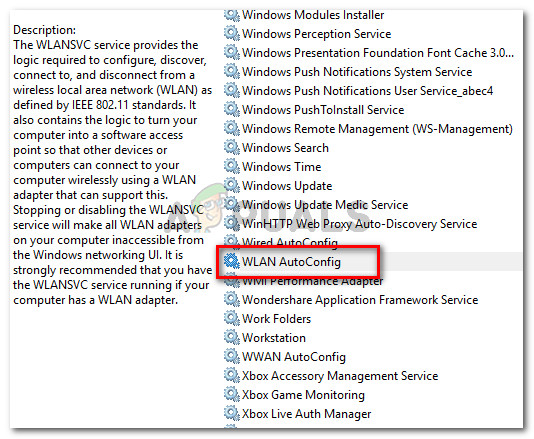
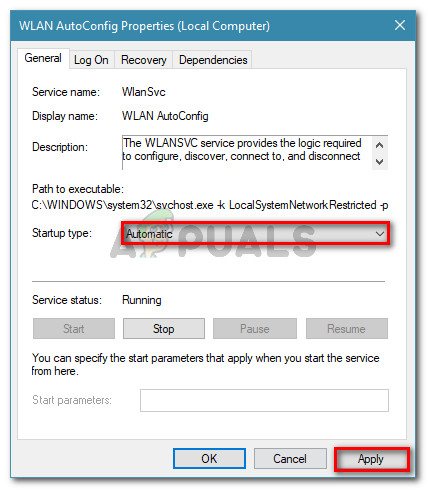
Method 4: Changing the Startup Type of AutoConfig to Automatic
Several users have reported that the “Windows couldn’t automatically bind the IP protocol stack to the network adapter” error was resolved after they changed the Startup type of the AutoConfig service to Automatic. Although this service should be enabled by default at every startup, a 3rd party application or a gone-bad upgrading process might modify the standard behavior. Here’s a quick guide on ensuring that the Startup Type of AutoConfig is turned on: If you’re still prevented from accessing the internet through your Wi-Fi, move down to the next method below.
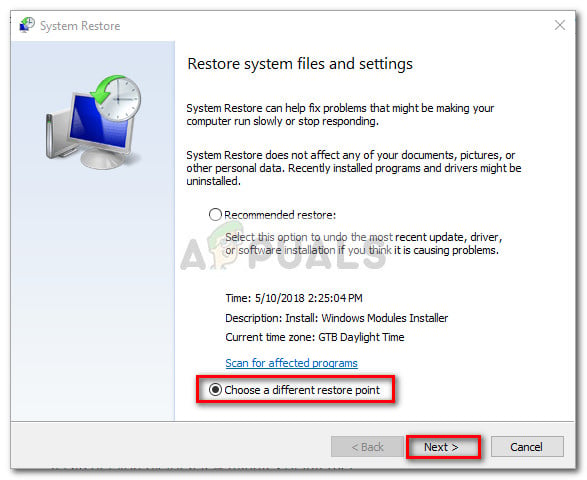
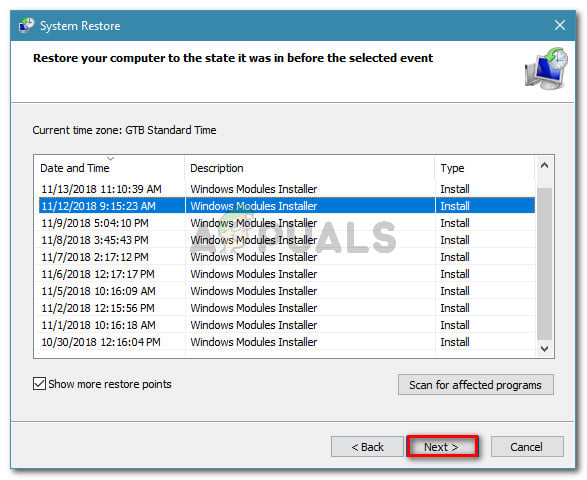
Method 5: Using a system restore point
If you’ve come this far without a result, you can probably get the issue resolved if you happen to have a saved system restore point dated before you started experiencing the problem. Some users in a similar situation reported that a system restore did it for them after a bad Windows update or a bad uninstallation of a VPN software. An older System Restore point will revert your machine to a state where your Wi-Fi adapter was functioning properly. Here’s a quick guide on how to do this: At the next startup, you should notice that your Wireless connection is working and you’re no longer encountering the “Windows couldn’t automatically bind the IP protocol stack to the network adapter” error.
How to Fix ‘Failed to Bind to Port’ Error on Minecraft?How to Fix “DRIVER OVERRAN STACK BUFFER” BSOD Error on Windows 10 & 11?What is Microsoft Network Adapter Multiplexor Protocol and Should it be Enabled?Microsoft Windows 10 Update Delivery And Packaging Technique To Get Combined…