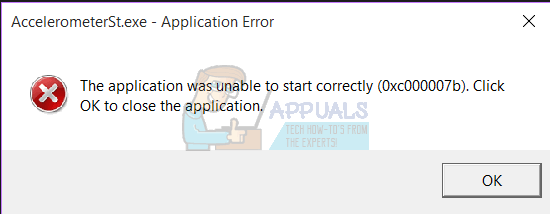
Users affected by this problem see this error message every single time they log in to their computers after booting it up, and it only goes away once the dismiss it. This problem has a wide array of different causes – from the VCRUNTIME140.dll file simply being corrupt or missing or an issue with a program known as HP 3D DriveGuard to the affected computer not having the latest Visual C++ redistributable package for Visual Studio 2015 or the redistributable package being corrupt. That being the case, there are also quite a few different possible solutions to this problem.
The following are the most effective solutions that you can use to try and fix this issue on your own:
Solution 1: Run an SFC scan
The SFC scan utility comes pre-installed on all versions of the Windows Operating System and is specifically designed to search computers for damaged or corrupt system files and either repair any that it finds or replace them with cached versions. If you’re seeing the error message described above every time your computer boots up, running an SFC scan is an exceptionally good place to start if you want to get rid of the error message. To run an SFC scan on a computer running on the Creators Update, you need to:
Solution 2: Un-register and then re-register VCRUNTIME140.dll
If your computer has the VCRUNTIME140.dll file but is still displaying the error message described above, the Creators Update may have messed with its registration and it probably just needs to be registered with your Operating System. In order to see whether or not VCRUNTIME140.dll exists on your computer, you need to:
Note: In the directory above, replace X with the drive letter corresponding to the partition of your computer’s hard drive that Windows is installed on. If the VCRUNTIME140.dll file does not exist on your computer, simply try out a different solution. If the VCRUNTIME140.dll file does exist on your computer, you need to un-register and then re-register it. To do so, simply: Once done, restart your computer and check to see whether or not the error message rears its ugly head when the computer boots up and you sign in to it.
Solution 3: Uninstall HP 3D DriveGuard (For HP users only)
If you’re experiencing this problem on an HP computer, there is a good chance that the cause of your sorrows is a stock HP application named HP 3D DriveGuard. HP 3D DriveGuard is actually a hard drive protection application designed primarily for laptops, but for some reason it is prone to going rogue and giving birth to this problem once the Creators Update has been downloaded and installed. To uninstall HP 3D DriveGuard, you need to: HP 3D DriveGuard is a hard drive protection application after all, and it actually does a pretty good job. So if you uninstall it to fix this problem but still want it on your computer, click here to download a version of HP 3D DriveGuard that is compatible with the Creators Update and doesn’t cause any unwanted issues and install it on your computer.
Solution 4: Download and install Microsoft Visual C++ Redistributable Package Update 3 for Visual Studio 2015
Solution 5: Repair the Microsoft Visual C++ Redistributable installed on your computer
Note: If you find that there is more than one listing for Microsoft Visual C++ 2015 Redistributable (there are usually only two), perform steps 5–7 for every single one of the listings.
Solution 6: Roll back to the Windows 10 build you were previously using
If nothing so far has worked for you, fear not – you can simply roll back to the Windows 10 build that you were using before you downloaded and installed the Creators Update and wait for Microsoft to get around to fixing this annoying little issue, after which you can reinstall the Creators Update. Provided that it hasn’t been 30 days since you installed the Creators Update (at which point your computer deletes the installation files required for the rollback), the process should be quick and easy. In order to roll back to the Windows 10 build that you were previously using, you need to At the login screen HOLD the SHIFT key and click the Power (icon) located on the lower right corner. Whilst still Holding the SHIFT key choose Restart. Once the System boots into the Advanced Mode, choose Troubleshoot and then choose Advanced Options. From Advanced Options, choose the option titled Go back to previous build. After a few seconds, you will be asked to choose your User Account. Click on the User Account, key in your password and choose Continue. Once done, choose the option Go Back to Previous Build again.
What is pcdrcui.exe? How to Fix pcdruci.exe Corrupted Error on Windows?What is Msiexec.exe? Fix Msiexec.exe Access Denied Error on WindowsWhat is “msedge.exe.exe”? and How to Fix It?FIX: “(Application Name).exe – Bad Image” is either not designed to run on…